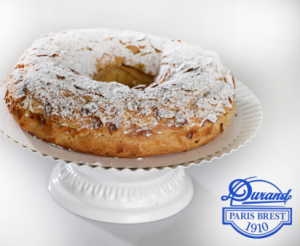
This classic of French patisserie can be found in many boulangeries or patisseries throughout France. It is based on choux pastry, a topic we covered in an earlier post. The recipe for this particular choux based product dates from 1910 when it was developed by Louis Durand of Maisons Lafitte to commemorate a bicycle race between Paris and the town of Brest that had been inaugurated in 1891 and which became the forerunner of the Tour de France.
The original recipe called for a ring of choux pastry garnished with a praline butter cream. The circular form was to represent a bicycle wheel. Initially the cakes were made on a large scale. Portions were available to cyclists ‘a la coupe’ alongside bread, to ensure sufficient energy to continue this challenging 1,200km race (Paris to Brest and back).
More recently the cakes have been sold as individual portions. Traditionally they are sprinkled with flaked almonds as decoration.
This image comes from a website that gives a full history of the pastry.
More recently the pastry has reached a new popularity thanks to Phillippe Conticini, French pastry chef. The aim was to modernise the look and to lighten the taste of this classic while maintaining its original characteristics: a circle of choux pastry with a praline based filling.
This recipe is based on that of Conticini, additional guidance was found on the website of Mercotte, judge in the French version of Bake Off.
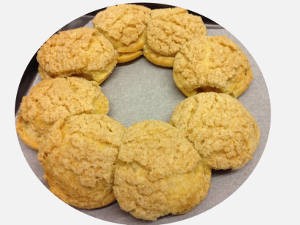
Three stages are necessary for this version of Paris Brest. The finished product can be used as one serving but because it is based on a ring of ‘chouquettes’, it can easily be shared. Amounts given below will be enough for three Paris Brest.
This version of choux pastry differs slightly from the one we provided earlier. The previous version will work just as well, this just offers an alternative.
This version will produce sufficient for 3 Conticini style pastries, each can provide up to 8 small portions.
Pre-heat your oven to 250c
First, prepare your baking sheet. Choux pastry needs to be piped while still warm so it is easiest to do any preparation in advance. It is easier to pipe the paste if you have a template to guide you. The diagram here is a miniaturised version of the template we use.
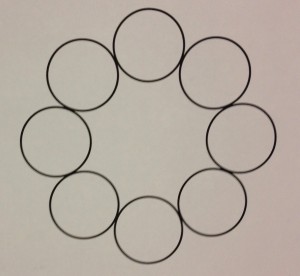
Each circle has a diameter of 35mm. You want each piped circle to touch its neighbours so that they will hold together to form an unbroken ring when baked.
If you don’t get this right first time don’t worry. At worst you will have 8 individual chouquettes that can still be filled and presented in a ring.
Craquelin
Addition of small discs of craquelin to each chouquette helps to ensure a more uniform bake. Simple to produce, a disc of craquelin can be added to any choux based pastry. Make this before you begin the choux paste itself so that it can set in the freezer making it easier to use.
You will need:
50g softened unsalted butter
60g Demerara sugar
60g plain flour
Don’t worry if you don’t get this right first time, it can take a bit of experimentation to get the texture and thickness right. Using butter that is soft but not melted will help enormously to get a craquelin that can be successfully rolled out. Placing the pre-marked sheet in the freezer while you make the choux paste will ensure that the butter has re-set sufficiently to allow the discs to be removed from the rest.
At worst you might find that the discs fall apart while baking. No problem, you will have pieces of crystallised sugar attached to the pastry rather than discs. Sprinkle with a little icing sugar, no-one need know that this wasn’t the intended result! Sometimes a little pragmatism helps, there is so much to learn to create good results but ‘mistakes’ needn’t mean disaster.
Choux Paste.
125g water
60g butter in small cubes
2g salt
2g sugar
80g plain flour
125g eggs beaten as for an omelette (approx 3 medium eggs weighed without shells)
The method is much as we have described previously. If you have mastered that and you don’t want to change just yet, make a batch to that recipe, come back here when your paste is ready to pipe. You will need to double the quantity to have sufficient for two Paris Brest.
The next stage can be done by hand or with a stand mixer (such as Kenwood Chef or Kitchen Aid).
The final result should be a silky, warm paste. Transfer this to a piping bag fitted with a 8mm (or thereabouts) nozzle.
This size nozzle works well but a millimetre either way won’t spoil the result. You can simply snip the end of your pastry bag and pipe direct if you don’t have a nozzle to hand. A plastic food grade bag can substitute for a piping bag if necessary, snip one corner to pipe.
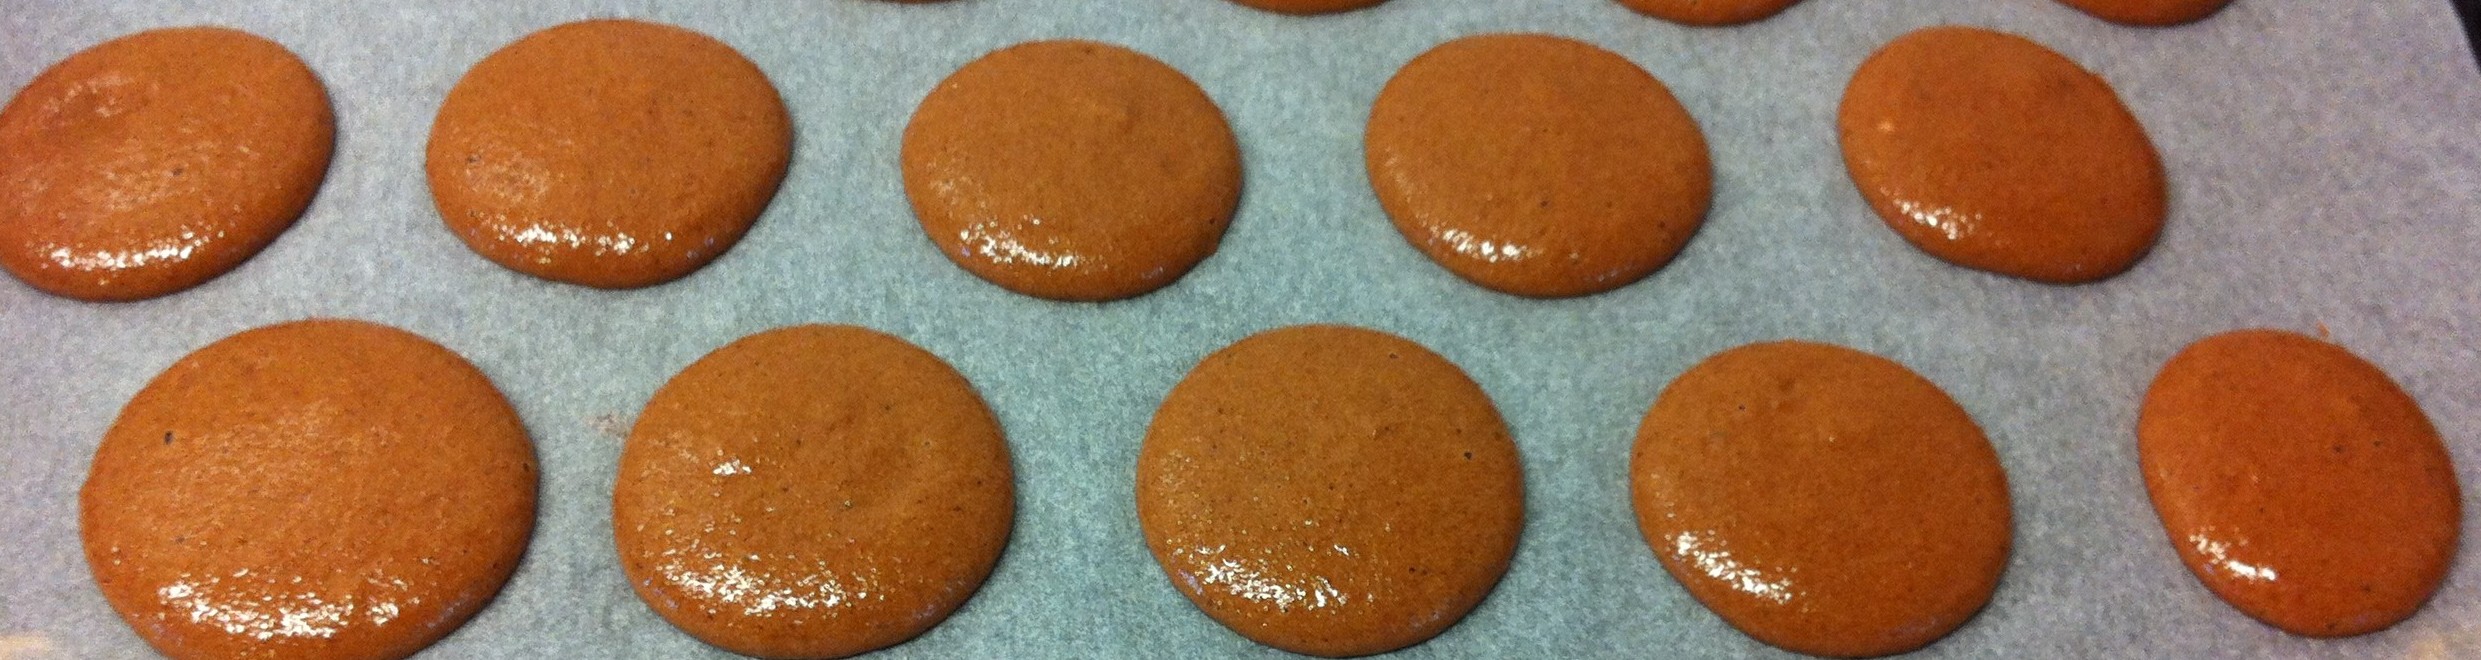
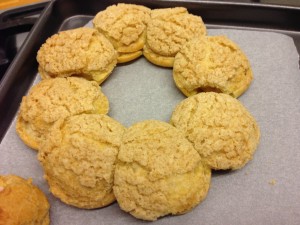
Here you can see choux pastry for one Conticini style Paris Brest capped with craquelin disks.
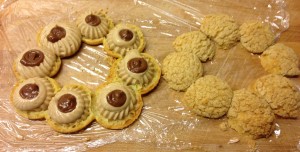
Of course you can pipe the choux paste exactly as you wish. This was my first attempt at Paris Brest, I piped two circles like the one show above. The rest of the paste was used to make an ‘eclair’, four chouquettes piped so that each touched the next and topped with chraquelin discs; also a few individual chouquettes. In all the paste would have been sufficient for three pastries as shown above.
If you decide not to make the craquelin you could sprinkle some candied sugar over the piped paste before baking.
Your oven should have reached 250c by the time your paste is ready to bake.
Ovens can vary significantly even if models appear similar. If you search the internet you will find advice that choux paste cannot be cooked in a fan oven, in a gas oven or in any other type of oven you can think of.
You will need to experiment to find cooking times and temperatures appropriate to your own device.
We have an electric fan oven with no option to cook in static heat. Despite advice that static heat is vital we have not found it difficult to cook choux paste.
Having placed the baking try into the preheated oven we turn the heat off but leave the fan running. If you don’t have this option don’t worry, you will just need to experiment a little until you find the settings that are right for you. Notes below give some information that might help you to achieve good results.
It is important to leave the oven door closed while cooking. Also to allow the pastries to keep cooking until they are risen and browned. Don’t panic if the piped paste looks disastrous at the end of the first 25 minutes. They will puff up nicely during the second part of the cooking process.
The easiest mistake to make is to stop the cooking process too early. Pastries look great when they come out of the oven but, as they cool, they collapse to a sad flat shape. It might seem odd that such small pastries need the best part of an hour to bake but this is certainly the case. Remember that the structure needs a strong exterior as it will be more or less hollow inside. We will write more about the science behind choux pastry in due course.
Here is where this version Paris Brest differs from the original. Traditionally the cakes were filled with a mixture comprising crème pâtissière and creme au beurre. This is a crème mousseline. A classic of French patisserie.
There is nothing wrong with crème mousse line but Phillippe Conticini replaced it with a praline cream, a (slightly) lighter option.
You will need:
2g gelatine soaked in cold water for 15 minutes before use
155g whole mix
2 egg yolks
30g caster sugar
15g corn flour
89g praline paste
70g unsalted butter at room temperature
It really is important to weigh your ingredients. Amazon, amongst others, sells digital scales for less than £10 allowing accurate weighing from .1gramme. The Amazon link will take you to the scales we bought in 2014, still working well with original battery!
Praline paste can be found easily via online retailers including Melbury & Appleton. In the alternative it can be made at home. Pierre Hermé has published a recipe, the link provided is to one of many sources detailing the recipe. We intend to show how to make praline and pistachio pastes in a future post.
The third essential for this and many other recipes is an accurate thermometer. We use a Thermapen, made by Electronic Temperature Instruments Ltd based in West Sussex. We are not affiliated with this company but we have been extremely impressed by their product.
Method
Remember to soak the gelatine in cold water for at least 10 minutes.
Prepare a piping bag with a 10mm nozzle.
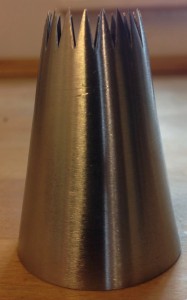
We used this but a plain nozzle would be just as good.
A measuring jug sufficient for 800ml would work. Our stick blender was probably the cheapest on the market when purchased some ten years ago, it came with a jug that holds 1l so ideal for tasks like this.
You will need:
100g praline paste
35g double cream
This third element of the recipe gives a more intense praline flavour to the finished Paris Brest but if you don’t have sufficient praline paste the cakes will still be good without an insert.
The insert is simply an emulsion between the praline and the cream. As with most emulsions used in patisserie it is recommended that you whisk the ingredients together in three stages.
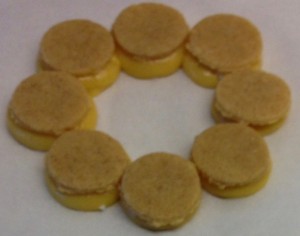
Once the choux circles are cool, slice them horizontally and gently lift away the top parts with the craquelin. This is a fragile task but a large sharp knife makes it easier than it might seem.
Pipe a good portion of the praline cream onto each of the eight base discs.
Pipe a small portion of the praline insert to the centre of each disc.
Carefully replace the top ring of discs.
Exactly the same procedure can be used to finish chouquettes individually, or piped together to form an eclair shape.